Construction Camera Setup Guide: From Delivery to First Timelapse
March 5, 2026
You have decided to add timelapse cameras to your construction project. The equipment is on its way. Now what?
Setting up a construction camera system is straightforward, but doing it well — getting the right angles, reliable power, and solid connectivity — makes the difference between footage that gathers dust and documentation that actually drives value.
Here is a step-by-step guide to going from delivery to your first timelapse capture.
Step 1: Site Assessment
Before the camera arrives, spend 30 minutes on-site answering these questions.
What Do You Need to Capture?
Define your primary objectives. Are you documenting overall progress for stakeholders? Monitoring a specific work zone for quality assurance? Recording the full site for security? Each objective influences camera placement differently.
For progress documentation, you want wide-angle views that capture the full scope of work. For security monitoring, you want coverage of entry points, material storage, and equipment yards. For quality assurance, you want focused views of specific work areas. If you are deciding between a dedicated construction camera and repurposing existing security hardware, our guide to the construction camera vs security camera difference is worth reading before you commit.
Where Can You Mount?
Survey the site for mounting locations. Ideal candidates include:
- Existing structures — adjacent buildings, parking garages, or permanent structures with clear sightlines to the project
- Tower cranes — excellent vantage points, but cameras must be repositioned when the crane is dismantled
- Dedicated poles — purpose-built camera poles provide flexibility and can be relocated as the project evolves
- Perimeter fencing — suitable for lower-angle security coverage but limited for progress documentation
What Power Is Available?
Identify power sources within reach of your mounting locations. Most construction cameras draw between 15 and 50 watts, so a standard 120V outlet is sufficient. Note distances — long cable runs may require outdoor-rated extension cords or dedicated circuits.
If no mains power is available at your ideal mounting location, solar panels paired with battery backup are a proven alternative. Most solar-powered construction cameras provide reliable operation across Canadian seasons, though winter performance in northern regions should be discussed with your provider. See our solar-powered construction cameras guide for a detailed breakdown of panel sizing, battery capacity, and seasonal performance across Canadian climate zones.
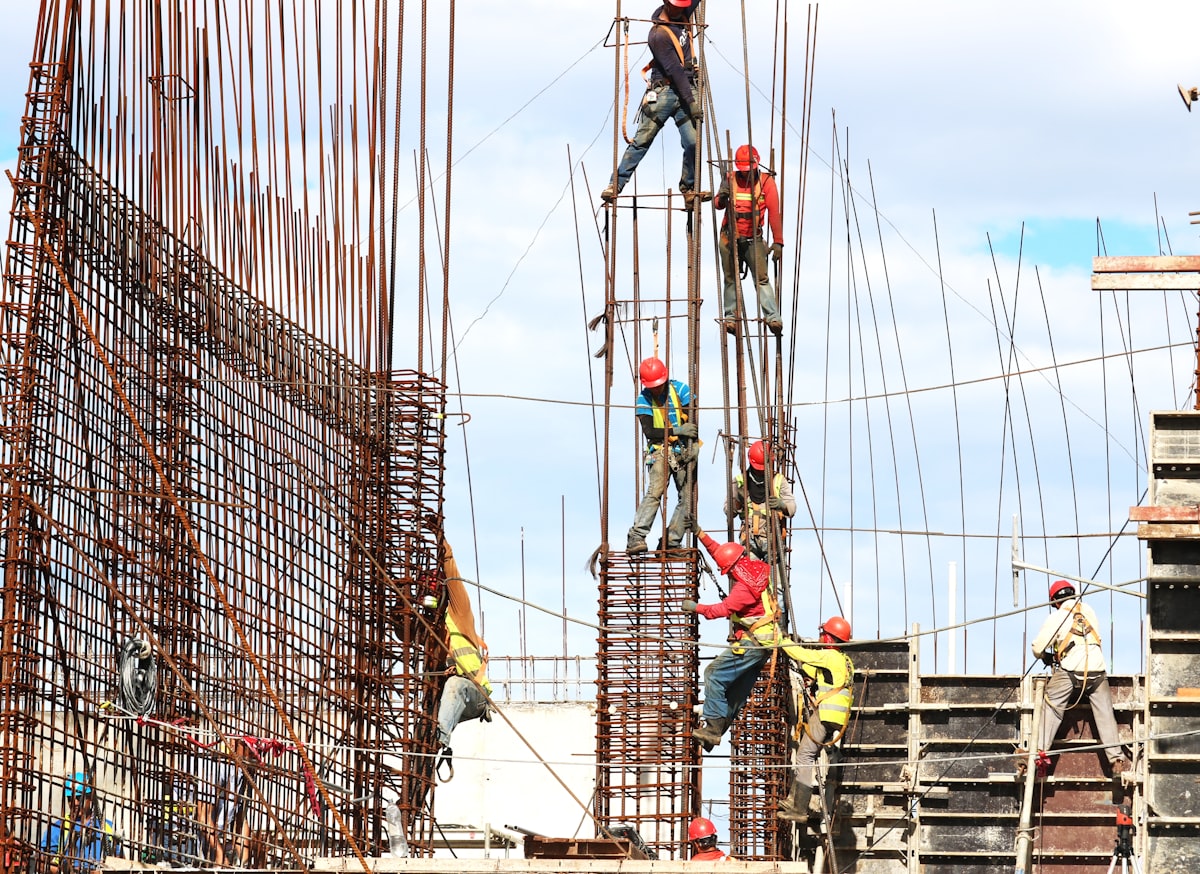
Step 2: Camera Placement
Getting the right angle is the single most important setup decision. A poorly placed camera generates months of mediocre footage that no one watches.
Height Matters
Aim for a mounting height of 6 to 15 metres. This range provides enough elevation to capture the full work area without being so high that ground-level detail is lost.
Below 6 metres, foreground obstructions become a problem — fencing, temporary structures, and equipment block the view as the project progresses.
Above 15 metres, workers and equipment become too small to identify, reducing the value of the footage for both documentation and security.
Orientation
Point the camera roughly north or south to minimize direct sun glare. East- or west-facing cameras will have the sun in frame twice daily, washing out footage during sunrise and sunset.
If you must face east or west, ensure the camera has good HDR (high dynamic range) capability to handle the contrast.
Field of View
A 110-to-130-degree wide-angle lens captures most commercial construction sites from a single vantage point. For larger sites, multiple cameras with overlapping fields of view provide comprehensive coverage.
Frame the shot with some margin around the project boundary. Construction projects have a way of expanding beyond their initial footprint — temporary facilities, laydown areas, and access roads all benefit from being in frame.
Future-Proofing
Think about how the site will change over the project lifecycle. A camera mounted on a building across the street will have a consistent view throughout. A camera on a temporary structure may need to be moved multiple times.
The best setup decisions account for the full project timeline, not just what the site looks like today.
Step 3: Power Configuration
Mains Power (Preferred)
If you have access to a standard outlet within 30 metres of the camera, hardwired power is the most reliable option. Use outdoor-rated, weather-resistant connections and secure cables away from foot traffic and equipment paths.
Consider having your electrician install a dedicated outdoor outlet at the mounting location. The cost is minimal compared to the value of reliable power over a multi-year project.
Solar Power
For remote sites or locations without convenient mains access, solar-powered camera systems are the standard solution. A typical setup includes a 100-200 watt panel with a lithium battery bank providing 3-5 days of autonomy.
In Canadian conditions, solar panels should be tilted at approximately 45 degrees and oriented due south. Winter performance varies by latitude — Southern Ontario and British Columbia get adequate solar year-round, while Northern Ontario and the Prairies may require larger panels or supplementary power during December and January.
Battery Backup
Regardless of your primary power source, a battery backup ensures continuous recording during power outages. Construction sites lose power regularly — generator refuelling, electrical work, storms — and gaps in your footage reduce its value for both documentation and security.
Most professional camera systems include built-in battery backup of 4 to 12 hours. For longer outages, external battery packs extend runtime significantly.
Step 4: Connectivity
The camera needs to send footage to the cloud. Here are your options.
Cellular (Most Common)
Most construction cameras use 4G LTE or 5G cellular connections. This is the simplest option — no reliance on site WiFi or wired internet, and coverage is available across most of populated Canada.
A typical timelapse camera uses 5-15 GB of data per month, depending on image resolution and capture frequency. Live streaming uses significantly more — 50-100 GB per month for continuous HD streaming.
Ensure your mounting location has adequate cellular signal. Use a phone to test signal strength before committing to a position. If signal is marginal, an external antenna can improve performance dramatically.
Site WiFi
If the construction site has a reliable WiFi network, the camera can connect directly. This avoids cellular data costs but ties the camera to the site network’s reliability — which, on construction sites, is often inconsistent.
Wired Ethernet
For permanent or semi-permanent installations, a wired Ethernet connection provides the most reliable and highest-bandwidth option. This is practical when the camera is mounted on an existing building with network infrastructure.
Step 5: First Capture and Calibration
With the camera mounted, powered, and connected, it is time to verify everything works.
Check the Frame
Log into the camera platform and review the live image. Verify that:
- The entire project area is visible
- There are no obstructions blocking the view
- The horizon is level (a tilted timelapse is surprisingly distracting)
- The image is sharp and properly exposed
Make adjustments now. Once construction is underway, repositioning the camera becomes more disruptive.
Set the Capture Schedule
For timelapse documentation, an image every 5-10 minutes during daylight hours provides smooth playback. At one frame per 10 minutes over a 12-hour workday, you capture 72 images per day — enough for a detailed daily timelapse.
For security monitoring, continuous recording or motion-triggered capture during off-hours is standard.
Test the Timelapse
After 24 hours, review the first day’s footage. Verify that:
- Images are capturing consistently without gaps
- Lighting transitions (dawn, dusk) are handled well
- The timelapse playback speed is appropriate
- Cloud upload is working and images are accessible in the platform
Set Up Alerts
Configure motion detection zones and notification preferences. You want alerts for after-hours activity in the work area, but not for every car passing on the adjacent road.
Spend a few minutes defining detection zones to minimize false alerts. Most platforms let you draw polygons on the camera view to specify exactly which areas should trigger notifications.
Step 6: Accessing Your Portal
With Sitelapse, your cameras appear in the dashboard as soon as they connect. From the portal, you can:
- View live feeds from any device
- Review timelapse footage by date
- Export clips for stakeholder reporting
- Share access with clients, consultants, and project managers
- Set up automated daily or weekly timelapse summaries
Each user gets role-based access, so you can give the project owner a view-only feed without exposing camera controls or administrative settings. For projects with multiple sites or distributed teams, our remote construction monitoring guide for Canadian builders covers how to structure portal access and reporting workflows across large programs.
Common Setup Mistakes to Avoid
Mounting too low. The most common mistake. What looks like a good angle at ground level becomes obstructed within weeks as construction progresses.
Ignoring sun position. A camera facing due west produces unwatchable footage every afternoon. Check sun paths before committing.
Weak cellular signal. A camera that cannot reliably upload is a camera that is not documenting anything. Test signal strength before mounting.
No battery backup. Power outages on construction sites are not rare events — they are weekly occurrences. Plan accordingly.
Forgetting about the lens. Construction sites are dusty. If your camera does not have a self-cleaning lens or wiper, plan for periodic manual cleaning.
Ready to Get Started?
Setting up a construction camera is a one-time effort that pays dividends for the entire project lifecycle. Get the placement right, secure reliable power and connectivity, and the system runs itself.
If you want help planning camera placement for your project, Get a Quote. We will review your site plans and recommend the optimal configuration. Or View Sitelapse Pricing to see which plan fits your project.
Self-Install vs Managed Install: What’s the Difference?
| Factor | Self-Install (e.g. TrueLook) | Managed Install (Sitelapse) |
|---|---|---|
| Time to first image | 1–3 days (shipping + setup) | Same day or next day |
| Technical skill required | Medium (mounting, config, networking) | None |
| Installation cost | Included in hardware price | Included in subscription |
| Optimal placement | Your judgment | Assessed by installer |
| Ongoing maintenance | Your responsibility | Sitelapse’s responsibility |
| Hardware replacement | Ship back, wait for replacement | On-site swap |
| Support | Phone/email | Local + phone/email |
Frequently Asked Questions
How long does it take to set up a construction camera?
With Sitelapse’s managed installation, a camera is typically operational within 24 hours of signing. Self-install systems (like TrueLook) require shipping time (3–7 days) plus setup time (2–4 hours).
Where is the best place to mount a construction camera on a site?
The ideal position provides a clear sightline to the main activity area, captures the building’s primary facade, is secure from unauthorized access, and has power or solar exposure. Sitelapse’s installers assess placement during installation — this is one of the key advantages of managed installation.
What height should a construction camera be mounted?
Typically 5–10 metres above ground level — high enough to see over equipment and temporary structures, low enough for stable mounting and maintenance access. For high-rise construction, cameras are often repositioned as the building rises.
Can a construction camera be moved during a project?
Yes. Sitelapse can relocate cameras as the project progresses — for example, repositioning a ground-level camera to a higher floor as a building rises, or moving cameras to follow active work phases. Contact us to schedule a relocation.
What power options are available for construction cameras?
Standard 110V (most sites), solar power (for remote or power-limited sites), and battery backup systems. See our solar-powered construction cameras guide for solar-specific guidance.
What internet connection is needed for a construction camera?
No on-site internet is required. Sitelapse cameras include cellular (LTE) connectivity as part of the subscription. Sites with existing WiFi or ethernet can use those connections for faster upload speeds, but cellular works everywhere with cell coverage.
What do I need to prepare before a Sitelapse camera installation?
Very little. Identify the site address and access contact, confirm power availability (110V outlet or solar preference), and confirm who the primary portal user will be. Sitelapse handles everything else — hardware, mounting, connectivity, and portal setup.